

Recently I’ve discovered embroidery work whose textures and colours feel like paintings. As a spinner, the idea of creating my own palette of threads truly resonates with me. On reflection, the most famous embroidered pieces date from well before the industrial revolution and mechanisation of the spinning process (e.g. Bayeux tapestry).
I’ve grown quite fond of the brightly coloured flora and fauna characteristic of the Jacobean style of embroidery (17th c). While the resources describing how to reproduce these styles are readily available and accessible, those describing the architecture of the yarns are much more limited. Understanding the relationship between the structure and fibre composition of a thread and its impact on hand stitching is definitely a realm I will be exploring in the future.
Luckily I had the opportunity to start exploring this interest through the mohair unit for my certificate in which, to my delight, I chose at random the end use “yarn for crewel for pillow top”.
Using adult mohair locks produce a 2- or 3- ply yarn suited to the end use you chose from a hat. It may be a blend if suited to the end use you choose.
Mohair unit, Ontario Handspinning Certificate
In this unit, our instructor emphasized the importance of establishing design criteria for the particular end use we would choose. This means (1) defining and setting the bounds of the problem, (2) determining which methods to use to achieve the design, and (3) sampling to demonstrate suitability (or not) of the final yarn.
What does “crewel” mean?
In our modern context, the word crewel is defined as a thin, loosely twisted, worsted yarn used for tapestry and embroidery[1]. While we do know the first recorded use of the word occurred in the 15th century its origin remains unclear despite various popular sources pointing out its resemblance to an ancient welsh word for wool.
Today, it seems the distinguishing factor between crewel embroidery and “normal” embroidery is not the stitch but rather the technique and materials used to make the yarn applied in the technique: crewel yarn is made of wool.
Given my burgeoning interest in embroidery I decided I would tackle spinning a yarn specifically for crewel embroidery. Given the use of the word crewel it would be a wool blend; however, this choice would still need to be justified in the context of the end use. The pillow would be decorative and its top a woven linen fabric. Given its decorative nature abrasion is not a significant concern nor is washing.
Architecture of modern crewel work thread
The architecture of crewel work threads varies greatly. For traditional embroidery and tapestry the threads are often 2- or 3-ply worsted-style yarns. The diameter of the thread varies with the fineness of a given design (e.g. modern analogy of “pixels”). Very fine drawings on linen require finer yarn than coarse motifs on plastic mesh (i.e. high number of pixels per square cm versus low number of pixels per square cm).
General design criteria for embroidery thread
After I discussed the topic with embroidery artists, reflected, and practiced stitching myself I came to the following general criteria for spinning embroidery threads:
- Yarn produced must be able to withstand the process of repeatedly passing through the fabric during stitching. The length of an embroidery thread ought not be longer than your forearm to prevent knots from forming. This limits the number of times a given section of yarn passes through the fabric.
- Only balanced ply twist will remain in the thread once it is cut. Given the length of the cut thread any extra twist “energy” in the ply will be released. This means the final angle of twist of the yarn must come exclusively from the interaction of the singles.
Interestingly, given embroidery is surface stitching the architecture of the yarn does not matter so much as long as it meets the above criteria. For decorative end uses, the choices are mostly aesthetic.
A yarn design for a decorative pillow
- I wanted well-defined flat stitches on the surface of the linen to produce the outline of a flower. To do so I chose a two-ply structure as three-ply would produce a rounder effect.
- I did not want the stitches to be as rigid and inflexible as a pure mohair yarn would be. That being said I also wanted to benefit from the lustre and strength of the mohair fibre. As a result I chose to produce a mohair-wool blend.
- The wool to be blended would be the only fibre that was available to me at the time: commercially prepared Corriedale combed top in the colour slate (Ashford).
- I chose to begin by sampling fibre prepared by hand carding but then also tested a combed preparation to determine the effect on the structure of the stitch.
- Given the staple length of the corriedale and mohair were quite different I decided to spin from the fold to maintain a homogenous blend.
- I wanted to produce fine stitches so would use long draw to produce a very fine diameter yarn (I find it much easier than short draw for very light weight yarns).
Sampling
It was important to demonstrate that my blended fibre was an improvement on the pure fibres for my particular end use. To do so, I spun three yarns from hand carded preparations as described above: pure slate (colour) corriedale combed top (Ashford, commercial preparation), pure adult mohair (Wellington fibres, intact locks dyed blue), and a 50:50 blend of the two. I then embroidered on a linen canvas in basic running stitch the outline of a flower sampling each of these threads (pure wool, mohair-wool blend, and pure mohair).
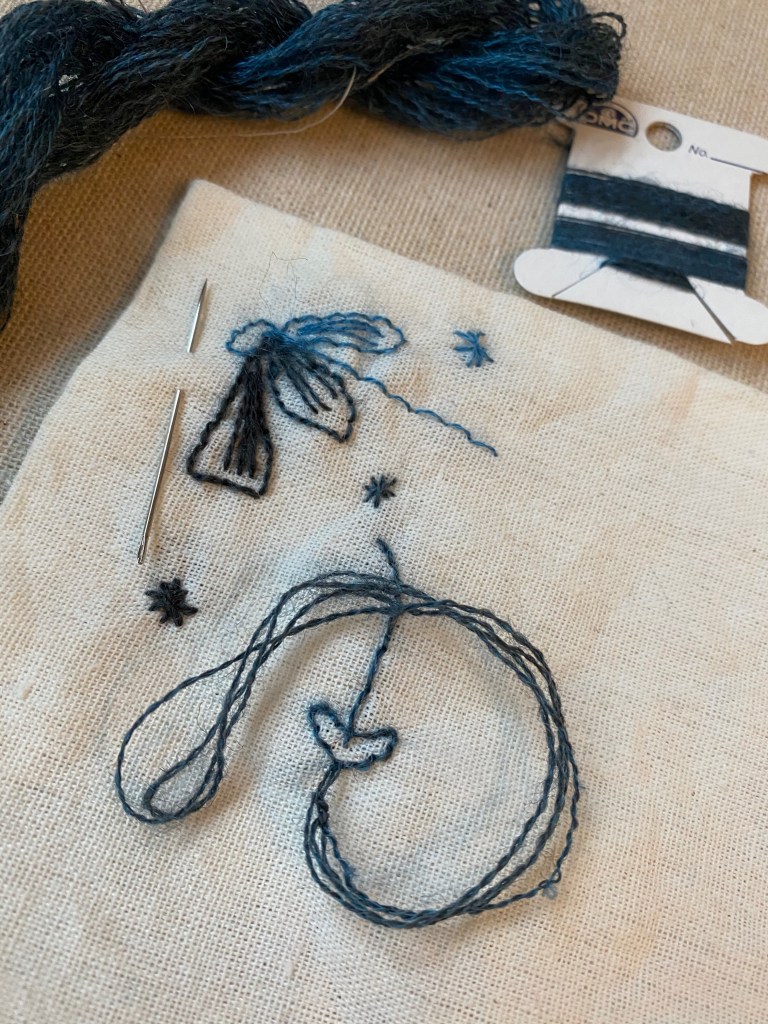
The yarns I produced are displayed above. Personally, I found the 50:50 mohair wool blend ideal to my end use. Its stitches were flat and well defined. It had the lustre of the mohair without its lack of body and rigidity. While the yarn was “bouncy” enough to fill the holes produced by the needle, the stitches didn’t loose their definition like the pure wool sample. I decided the blend was appropriate to my end use.
I was curious whether I could draw out the lustre of the mohair by using a combed preparation rather than a carded preparation. I sampled the resulting yarn (the arrow and yarn tail displayed above). While it is rather difficult to see the difference in the picture, the stitches are more lustrous and better defined. Having then determined that no significant damage was made to the yarn from the abrasion of passing through the cloth repeatedly I determined this would be my final yarn for the outline of a flower. In the future, I would also consider using the hand carded blend for a slightly muted look.
The relationship between staple length and the length of a stitch
To finish my little sample I soaked it in water then laid it out flat to dry. Interestingly there was very little halo produced from the mohair. I tried to produce a halo by rubbing the thread with my finger and noticed that the staple length of the fibre is much longer than the length of the stitch. This seemed to prevent the halo from forming. I will definitely need to explore the relationship between staple length and the structure of the stitch in the future …

[1] Stevenson, A. 2011. Oxford dictionary of English. 3rd ed. [Oxford]: Oxford University Press.
